DIY Halloween Welcome Mat with Footprints Ghosts


After a long and scorching summer in Austin, Texas (that still really has no end in sight), I am ready for the fall and all the holiday festivities that go along with it. I've been itching to bring out my fall decor and buy some new festive decorations. While searching the internet for some cozy and fun fall decorations, I stumbled upon several versions of “make your own welcome mat” and many fun crafts that incorporated your children's hand and/or footprints. That's when I got the idea to combine the two and create my own Halloween welcome mat with my kids' footprints turned into cute little ghosts. It was such a sweet way to capture this moment in time with my kids and a fun activity for us to do together. My toddler absolutely loved it! The project was also easy for a novice crafter like me and didn’t break the bank.
If you're feeling the fall vibes too, I wanted to share exactly what I used and how I made my own Halloween Welcome mat. I hope you enjoy this little DIY project as much as my toddler and I did, and maybe even put your own creative spin on it.
By the way, I've included links to the supplies I used as an Amazon Associate. Just so you know, I earn a small commission when you buy through one of my links, and I really appreciate your support!
What you will need:


Several 1in Acrylic Paint Brushes
(Optional) Halloween Stencils
Steps
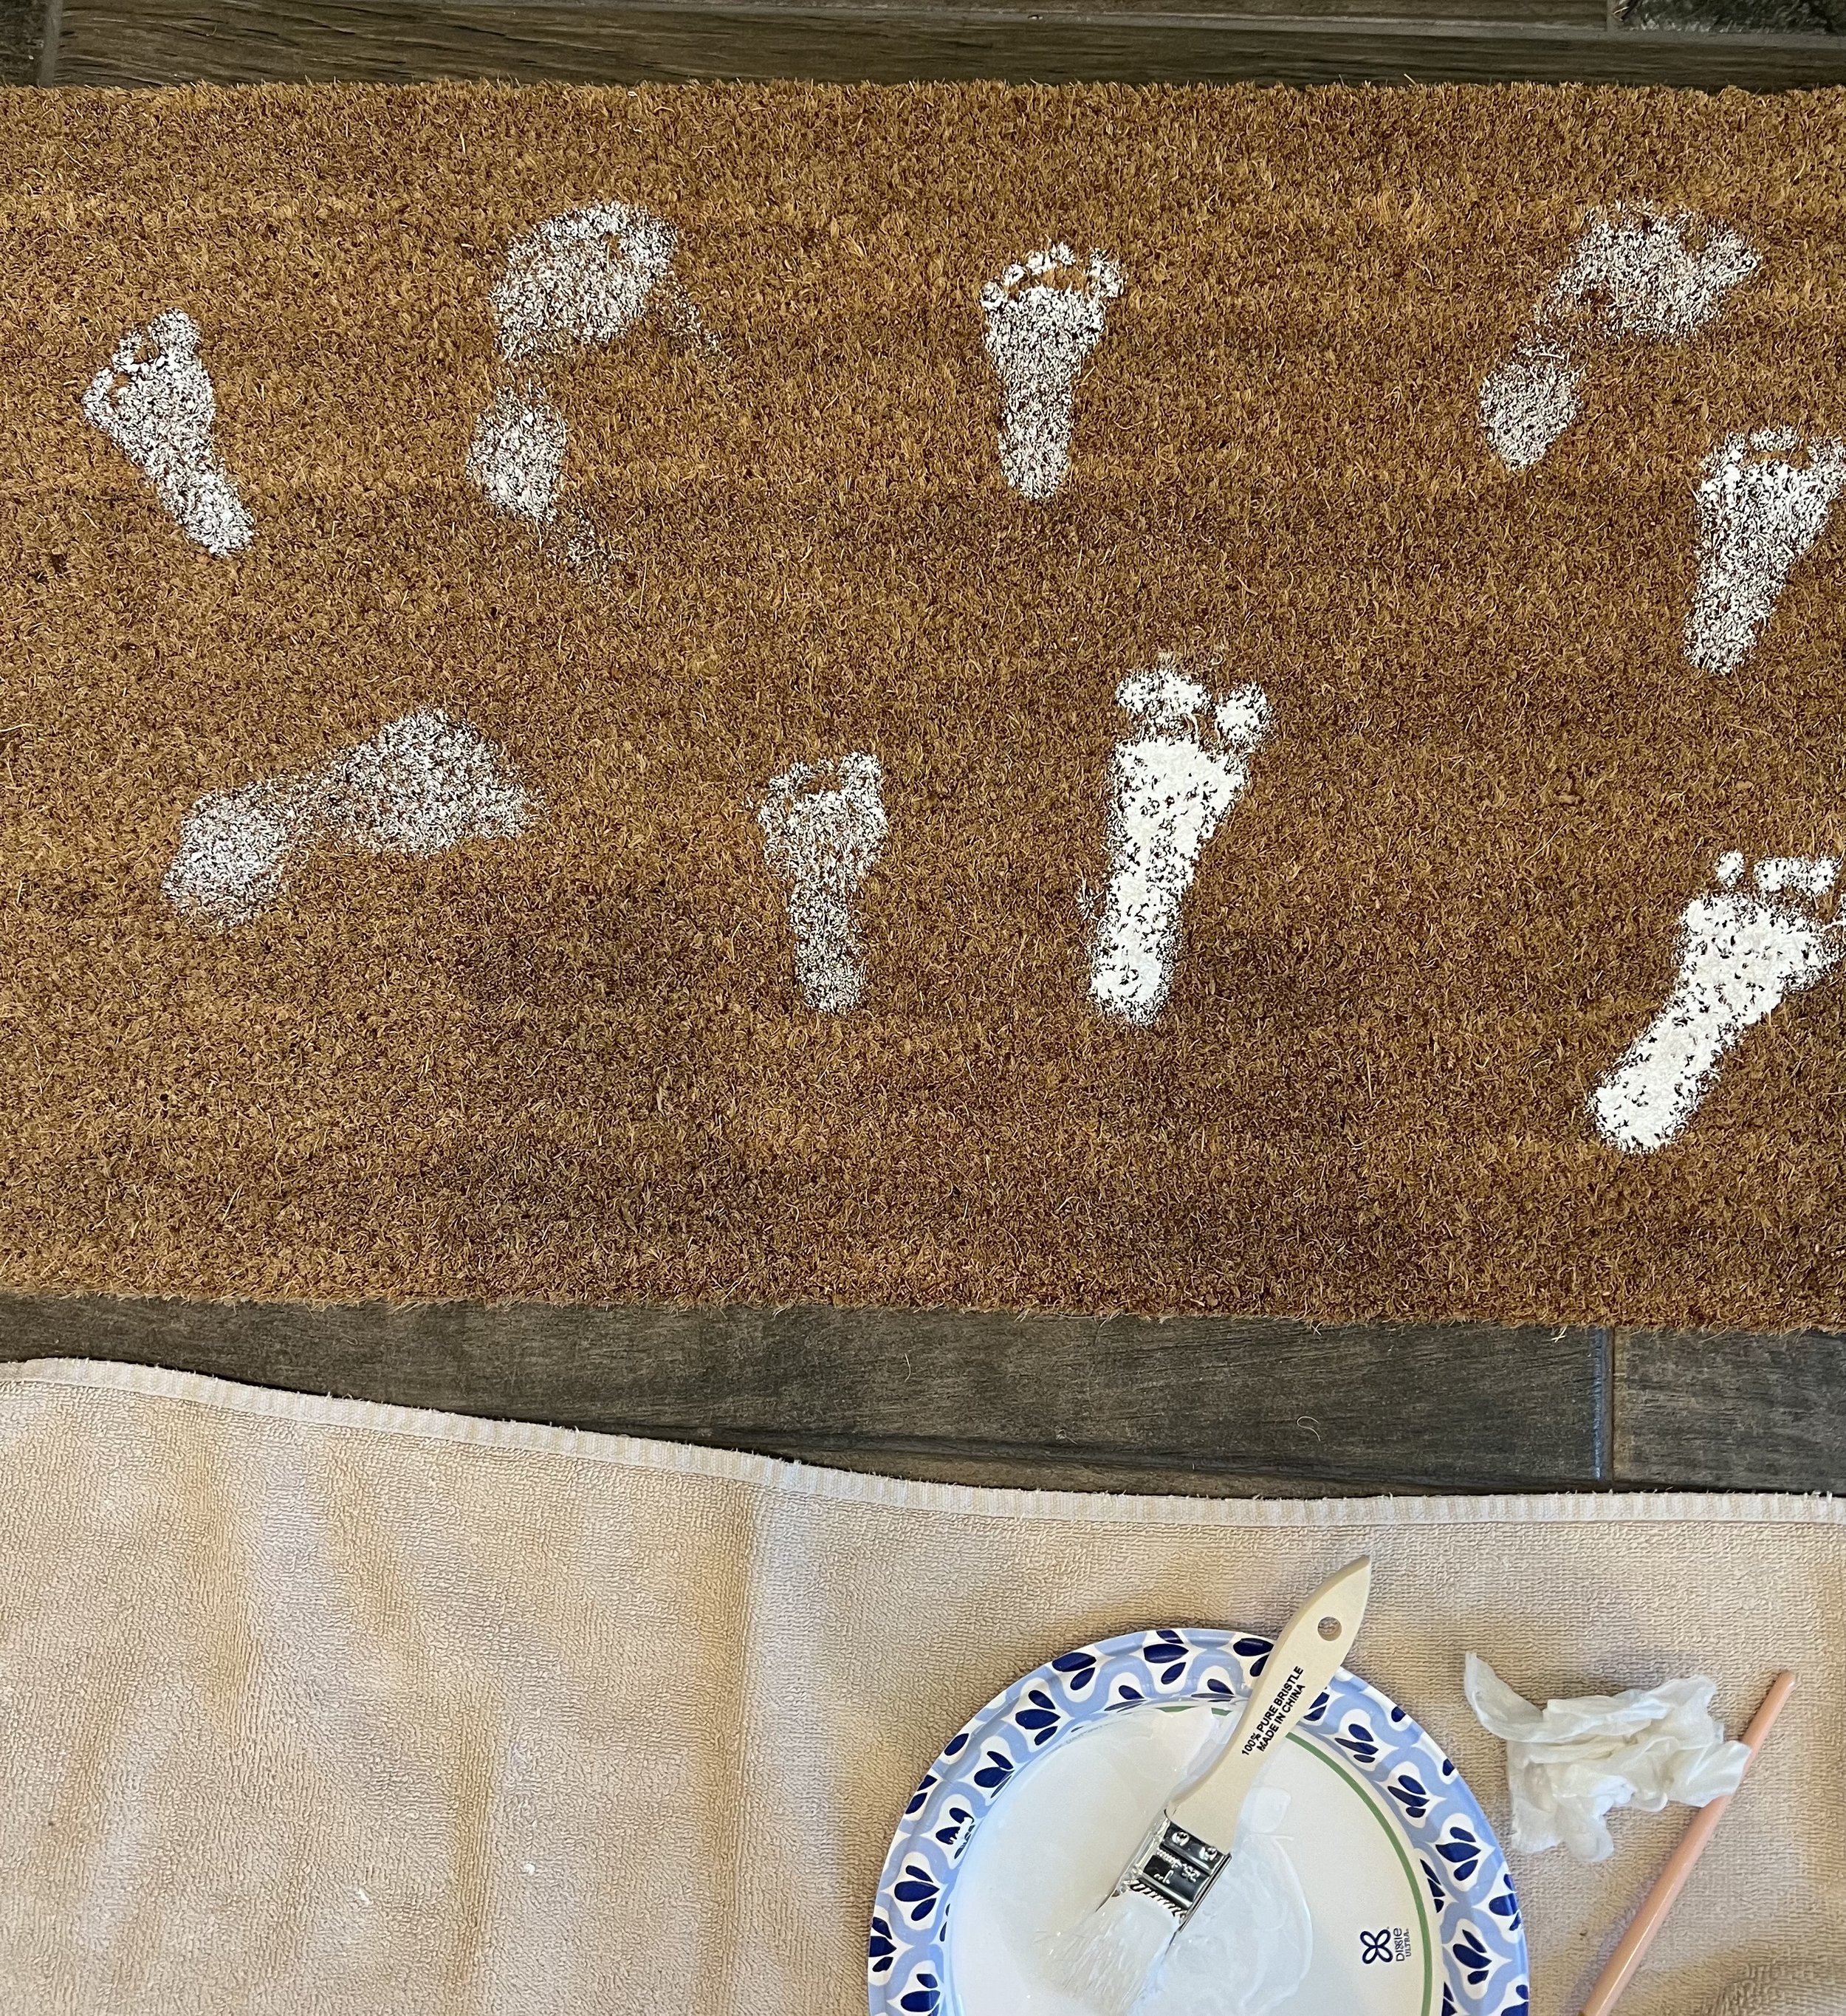
To get started, I squeezed a generous amount of white acrylic paint onto a plastic plate. Using one of my trusty 1-inch paint brushes, I dipped it into the paint and carefully applied it to one of my children's feet. With utmost care, I guided their painted foot onto the welcome mat, making sure they pressed their toes down firmly to ensure that all the paint transferred onto the mat.
I repeated the process of creating white footprints on the welcome mat several times. Next, I followed the same procedure with my other child's foot, which was slightly smaller. I didn't overthink the pattern while pressing their feet, but I made sure all the feet faced the same direction, with the toes pointing one way and the heel pointing the other.

After making all the foot impressions on the mat, I took a smaller tip acrylic brush and added more white paint to each footprint, ensuring that the prints were well-defined and dark.
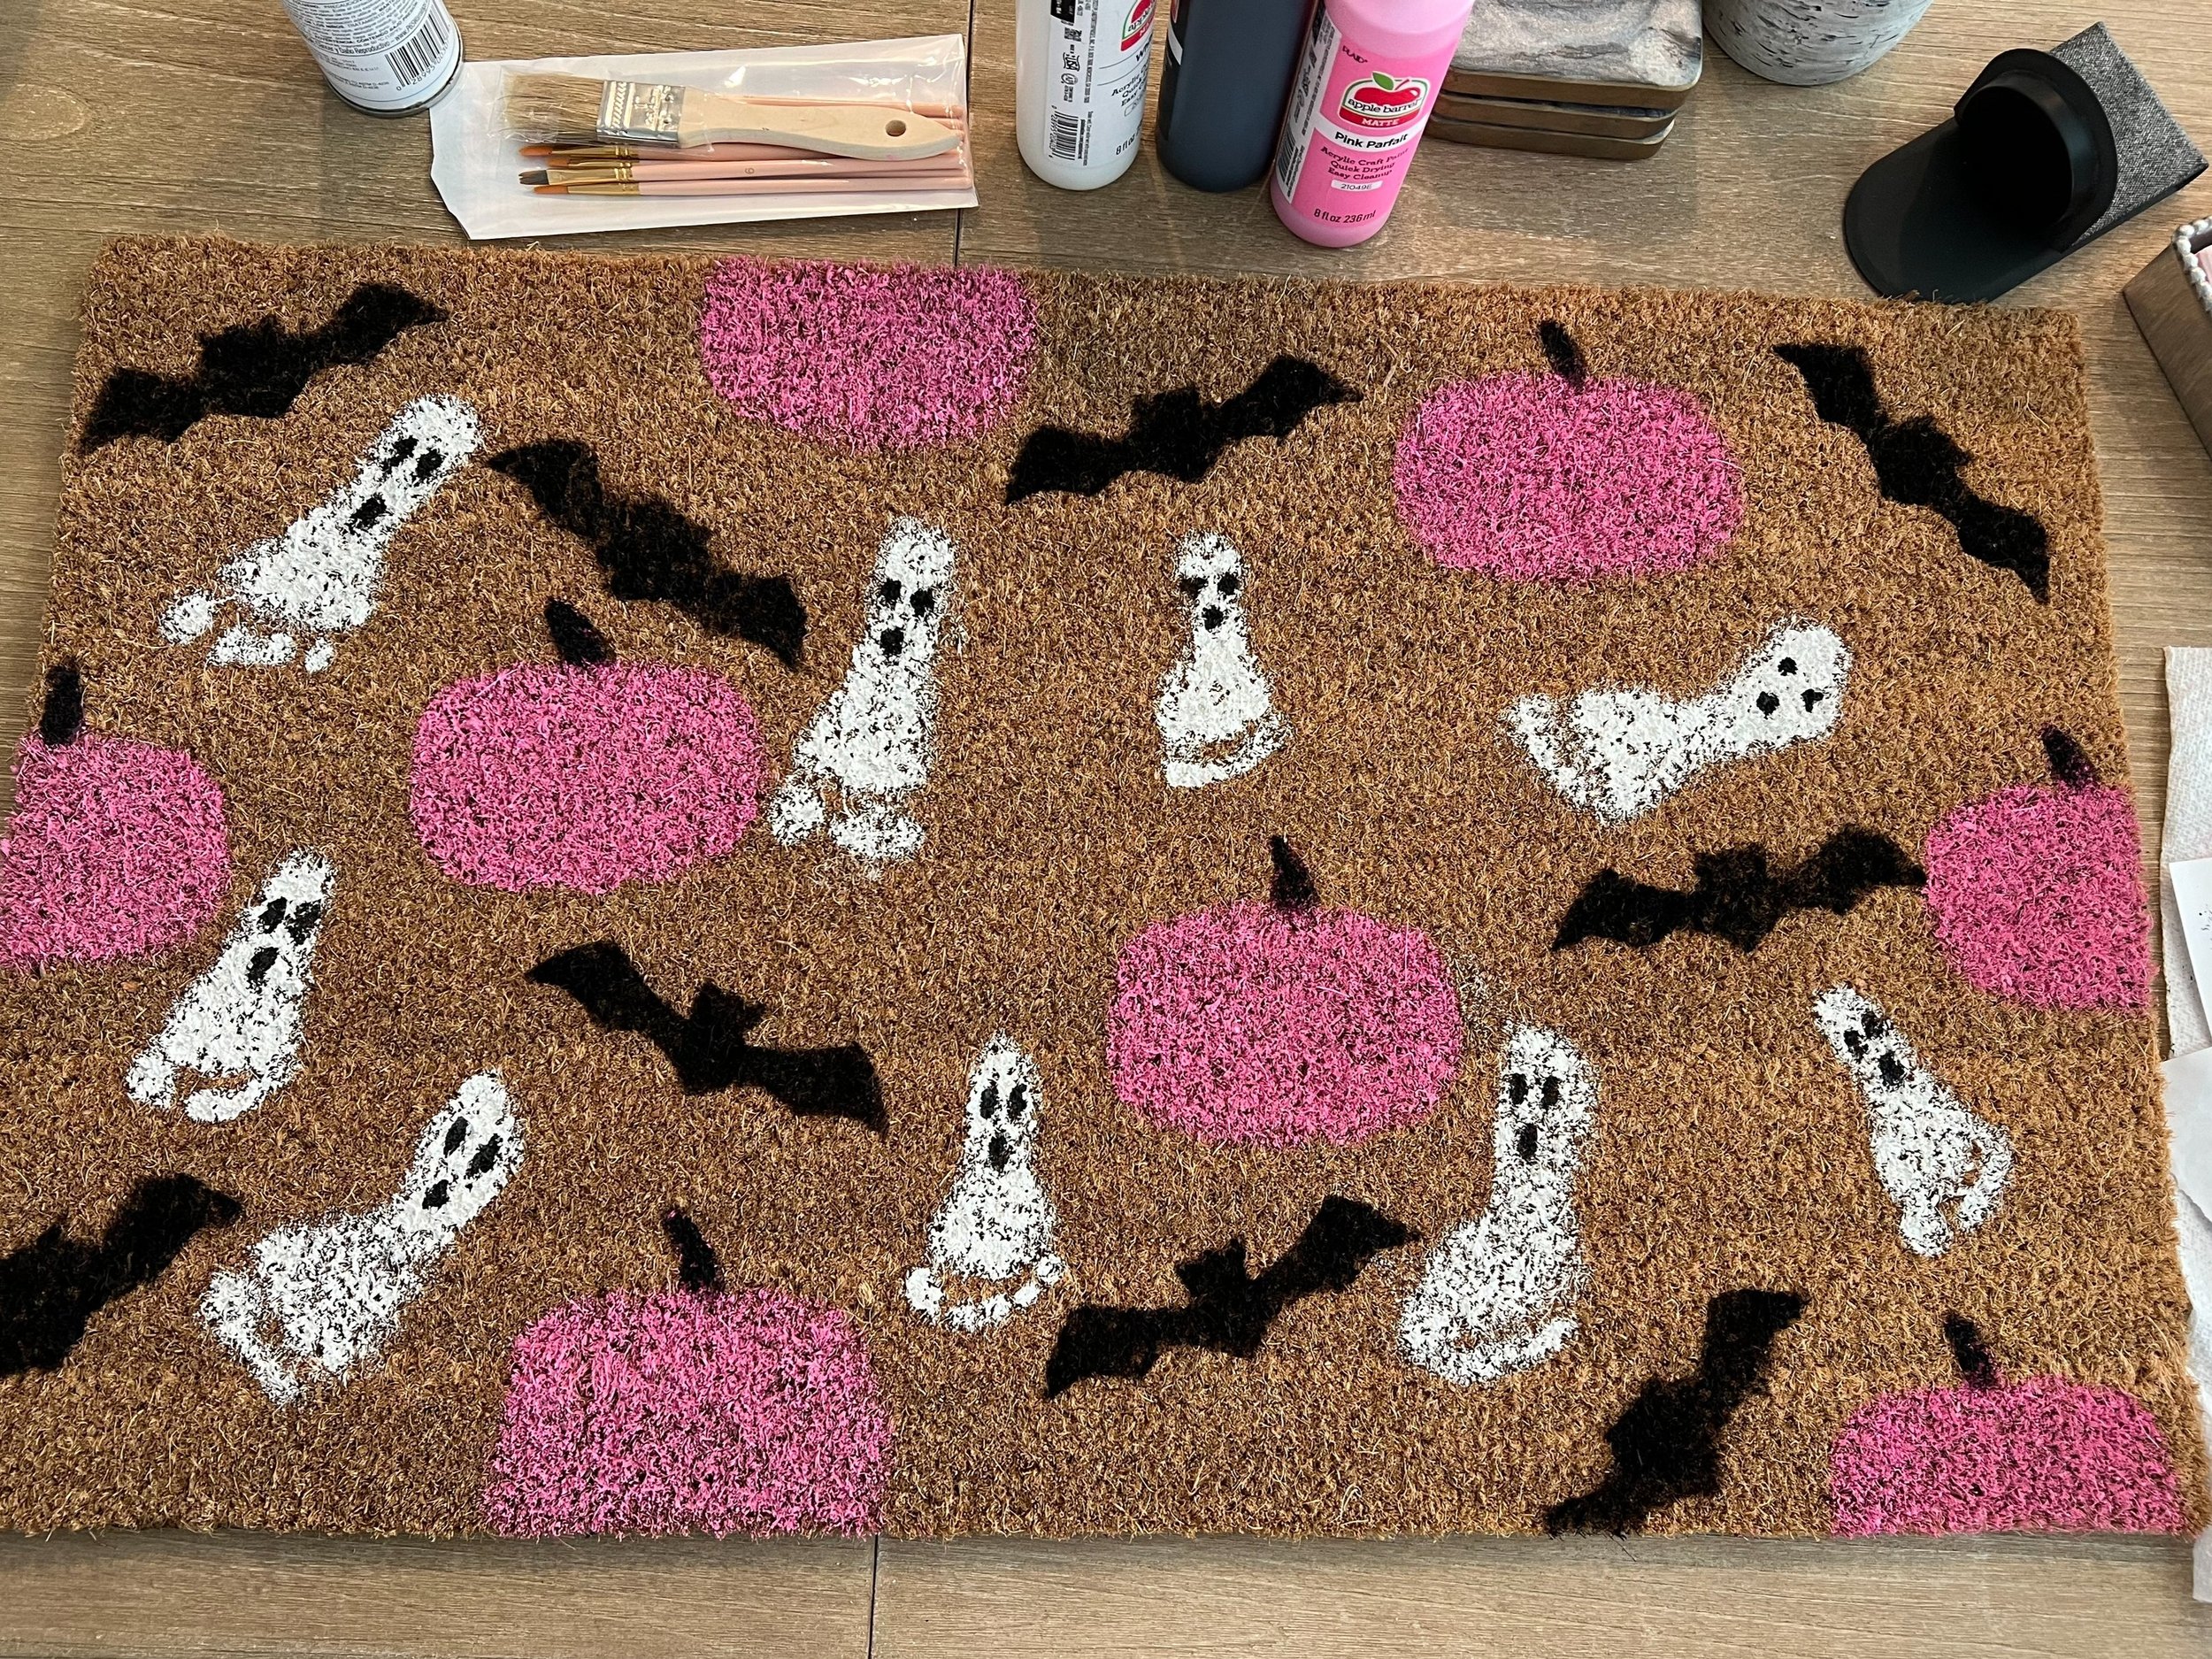
While waiting for the footprints to dry, I proceeded to add several pink pumpkins using a stencil. Since I didn't have an official stencil, I simply printed out a pumpkin image and created my own DIY stencil by cutting it out. I didn't worry too much about a specific pattern; instead, I focused on filling the larger spaces with pumpkins. I even stenciled and painted some pumpkins on the edge of the mat. I made sure that all the stems of the pumpkins faced the same way as the heel of the footprints.

Once the pumpkins were drying, I returned to the now dried white footprints and used small, pointed tip paint brushes to add ghostly eyes and an open circle mouth to each footprint. I placed this face at the heel of each footprint, transforming them into little ghosts. The "toes" part of the footprint acted as the bottom of the ghost.


The final touch on my welcome mat was adding some black bats to any remaining open spaces. Again, I utilized my own DIY stencil, but using a purchased stencil might be easier. To commemorate the age of my kids when we captured their adorable footprints, I added the year to the bottom of the mat.

Once all the paint had dried, I applied an acrylic setting spray across the entire mat to set and protect the masterpiece.
After everything was dry, I moved my welcome mat outside onto my porch and styled it with a charming rug placed underneath, along with some pumpkins and mums. I absolutely adored this project and how it turned out! One of the best aspects is that you can take this spooky welcome mat idea and truly make it your own by using various colors and stencils.


I hope you enjoy this DIY, and I would love to see some pictures of your creations! Until next time, Stay Spooky! Xxx, McKenzie